'How to' Guides

OUR 'HOW TO' GUIDES

Our  job is to make your life easier


OUR 'HOW TO' GUIDES

Image shows - exterior shot of laminates
Email us for more info

OUR RANGE OF SELF-ADHESIVE PRODUCTS IS EASY TO APPLY ON-SITE, 

WITH NO SPECIALIST EXPERTISE OR EQUIPMENT REQUIRED.


To help you get better results every time, please read our easy-to-follow ‘How to’ guides, which cover everything you need to know from cleaning and surface preparation to product application.


WE’VE MADE IT AS EASY AS A, B, C… D, E, F, AND G. 


And if you can’t find the answer you need in the ‘How to’ Guides below, we would be happy to help with more information for your specific needs.
Image shows - Print On for banner and display graphics

YOU WILL NEED:


Mild detergent, (avoid soaps containing wax, oil or lotions (1*).

Isopropyl alcohol (IPA)

Clean water

Lint-free cloth or paper towel

Please note: If your substrate surface is corroded, we recommend that you treat it with a fine abrasive plug to remove any particulars before cleaning the surface. 

HOW TO... CLEAN AND PREP SURFACES


Gardiner Graphics Supplies Europe self-adhesive materials can transform a vast range of surfaces, from glass and walls to floors and vehicles.

Whatever your working surface, if you want wow-factor results – that stick! - it needs to be cleaned and prepped before application. 

HOW TO CLEAN YOUR WORKING SURFACE:


Use your non-waxy, soap-based cleaner with water to wash the surface. You need to remove all dirt and other contaminants, like grease.

Rinse the surface with clean water.

Dry the surface thoroughly, with a lint-free cloth or paper towel. 

If the surface allows (2*), wipe it with a lint-free cloth soaked in isopropyl alcohol (3*) or denatured petrol until all dirt and grease have been completely removed.

HOW TO PREP YOUR WORKING SURFACE:


Make sure your surface is fully cured, especially if the surface has recently been painted or printed with a solvent / eco-solvent ink.

You will need to leave painted surfaces to dry and harden for one week before lamination. Solvent ink printed surfaces require 48 hours.  

Please note: Paints dried at room temperature will need 7-10 days to dry completely.

Make sure your surface is free from any residual solvents. Solvent residues in painted substrates (paint not perfectly dried) can affect adhesion and cause excessive shrinkage or blistering. You can remove solvents with a hot air gun. This stage is especially important if your substrate surface is uneven, has rivets or grooves.

If your substrate surface is damaged, you can achieve better results with your self-adhesive products if you repair the damage before applying graphics.

(1*) Certain cleaning products, like window cleaners, contain waxes. Some automated vehicle cleaning equipment uses chemicals that can affect adhesion. We recommend you spot test specific cleaners, in an area that will not be seen, before using across the whole substrate. Please follow manufacturers’ recommendations for any cleaning product you use.
(2*) Cleaning with IPA is not recommended for some substrates, like latex paint, oil-based paint, ABS, Plexiglass, fibreglass and polystyrene.
(3*) If your IPA is industrial grade, mix 1-part IPA with 2-parts water. If you are using rubbing alcohol (90º), do not dilute it.


Image shows - Wall Print 300 FR digitally printable wrap

YOU WILL NEED:


50mm masking tape

2 squeegees

A heat gun (if there are rivets on substrate surface)

A pin (to pop air bubbles)

A knife or blade to trim edges

HOW TO... GUARANTEE BEST RESULTS WITH DRY APPLICATION OF SELF-ADHESIVE MATERIALS


We recommend dry application of self-adhesive materials for products like wall graphics.

Whatever your working surface, if you want wow-factor results – that stick! - it needs to be cleaned and prepped before application. 

Please follow our guide on How to Clean and Prep surfaces before beginning any application of self-adhesive materials. 

HOW TO GUARANTEE THE BEST RESULTS:


Ensure all rivet areas and joints are completely dry. If needed, dry with an air gun.

Depending on the size of your self-adhesive materials, decide whether it is best to apply horizontally or vertically.

Carefully align graphics, then use your masking tape to secure the top section of the graphics to create a hinge. For best results, attach 25mm of masking tape to the surface and 25mm to the graphics.

This hinge will make sure your graphics remain in the perfect position while you smooth them onto the substrate surface.

Slowly remove the self-adhesive material from its backing liner and use a squeegee to smooth the graphic onto the surface.

Use the squeegee, in overlapping strokes across the self-adhesive material to make sure all air bubbles are pushed out from the centre towards all the edges. Each time start at the centre and move to an edge.

If the substrate surface has rivets or uneven joints, use both squeegees and a heat gun to remove trapped air.

Before the adhesive dries fully, use a pin to pop any remaining air bubbles and squeegee all areas again to make sure it is completely smooth. Pay particular attention to the edges.

Do not ‘stretch’ the graphic around corners or edges.

Trim excess self-adhesive material to size.

Squeegee across the entire surface again.

Allow to dry for at least two hours.


Image shows - G-Dot digitally printable repositionable / removable film

YOU WILL NEED:


1-2 squeegee(s)

1-part non-waxy/non-oily washing up liquid to 25-parts water (1*)

A pin (to pop air bubbles)

A knife or blade to trim edges

HOW TO... GUARANTEE BEST RESULTS WITH WET APPLICATION OF SELF-ADHESIVE MATERIALS


Wet application of self-adhesive materials is recommended when applying graphics to smooth surfaces like glass. It means you can ‘float’ the graphics across the surface as you align it correctly. 

Whatever your working surface, if you want wow-factor results – that stick! - it needs to be cleaned and prepped before application. 

Please follow our guide on How to Clean and Prep surfaces before beginning any application of self-adhesive materials. 

HOW TO GUARANTEE THE BEST RESULTS:


Make sure you have enough working space for the application process. The substrate onto which you are applying graphics needs to be on a level and even surface.

Always use the minimum amount of water possible.

Limit, as far as possible, the amount of time the self-adhesive material is in contact with the water to minimise the level of whitening caused to the adhesive caused by re-emulsification (2*). 

Align graphics quickly, then use a squeegee to push out water from the centre to the edges.

Make sure there is minimal hand contact with the adhesive side to avoid dust, grease or dirt transference.

Ensure you remove all water when you squeegee from the centre of the graphic to the edges.

Do not ‘stretch’ the graphic around the corners or edges.

Do not ‘force’ the graphic into corners, as this will stretch the self-adhesive material and can lead to delamination when in use.

Pop any remaining air bubbles with a pin and squeegee all areas again to make sure it is completely smooth.

Make sure you keep at least 2mm from the edges, then cut and remove excess.

(1*) Adding a small amount of washing up liquid, or neutral detergent, helps the water to spread, which means you need less water when ‘floating’ the graphic. Less water means less whitening.
(2*) Some whitening will occur with all water-based adhesives, but this will disappear after 24 hours, when the water has evaporated.

Image shows - G-Cling static cling window film

YOU WILL NEED:


1-2 squeegee(s)

1-part non-waxy/non-oily washing up liquid to 25-parts water (1*)

HOW TO... APPLY SELF-ADHESIVE MATERIALS TO GLASS


Gardiner Graphics Supplies Europe has a wide range of self-adhesive graphics (decals), so you can create eye-catching displays on windows and in pop-up exhibition displays.

We recommend wet application when applying graphics to smooth surfaces like glass, even if dry application is possible. 

Whatever your working surface, if you want wow-factor results – that stick! - it needs to be cleaned and prepped before application. 

Please follow our guide on How to Clean and Prep surfaces before beginning any application of self-adhesive materials. 

HOW TO GUARANTEE THE BEST RESULTS:


When applying graphics to glass, it is especially important to ensure the surface is properly cleaned and prepped first.

If you are applying graphics to external windows, make sure the outside temperature is between 15ºC and 25ºC (1*).

Wet the glass surface with enough water/washing up liquid mix so that you can easily slide, or ‘float’, the graphics onto the glass.

When you have your graphics in the perfect position, gently smooth the water mixture out.

Work a soft squeegee from the centre to the edges of the graphics to push out the ‘free’ water mix.

Keep pushing out the water mix until only a very thin layer remains between the self-adhesive material and the glass surface.

Allow at least 24 hours for this layer of water to evaporate.

(1*) If outside temperatures are very high, add 3ml-5ml of window cleaner to your water solution to slow evaporation.

Image shows - printed banner created with Print On

YOU WILL NEED:


A laminating machine, to achieve the best results

HOW TO... OVERLAMINATE


Do you need your print to last longer? Do you need to protect your print from scratches? Do you need to stop your print deteriorating over time? Then, you need to overlaminate.

For the best results, you also need to choose the right overlamination product for your print and graphics. 

Gardiner Graphics Supplies Europe has developed a range of premium quality films, and we work with our partners around the world to bring you the latest overlamination products.

Our wide format pressure sensitive laminates, including eco pressure sensitive laminates, come in a variety of finishes. Whether your design brief calls for matt, satin matt, gloss, crystal, anti-graffiti or drywipe, we have an overlamination product for you. 

HOW TO GUARANTEE THE BEST RESULTS:


To guarantee the best results, leave the print to cure for at least 24-48 hours to make sure it is completely dry.

This drying time will also enable any remaining solvents to degass, which is very important before you overlaminate the print.

The printed media and the laminate need to be conditioned at the same temperature for at least 24 hours. We recommend a minimum of 10ºC (50ºF).

Laminate the film to the printed media using a laminating machine. (Insufficient roller tension can cause bubbles and wrinkles to appear as you laminate).

You can reduce the ‘silvering’ effect by using a heated roller facility. Set the roller temperature to 30ºC (86ºF). Do not overheat as this can cause premature PVC shrinkage.

DO YOU HAVE MORE QUESTIONS ABOUT OVERLAMINATION?

Talk to us. We can help.

Image shows - PS Crystal 100 pressure sensitive PVC lamination film for floors

YOU WILL NEED:


50mm masking tape

1-2 squeegee(s)

A knife or blade (to trim excess)

A heat gun

Water repellent sealant

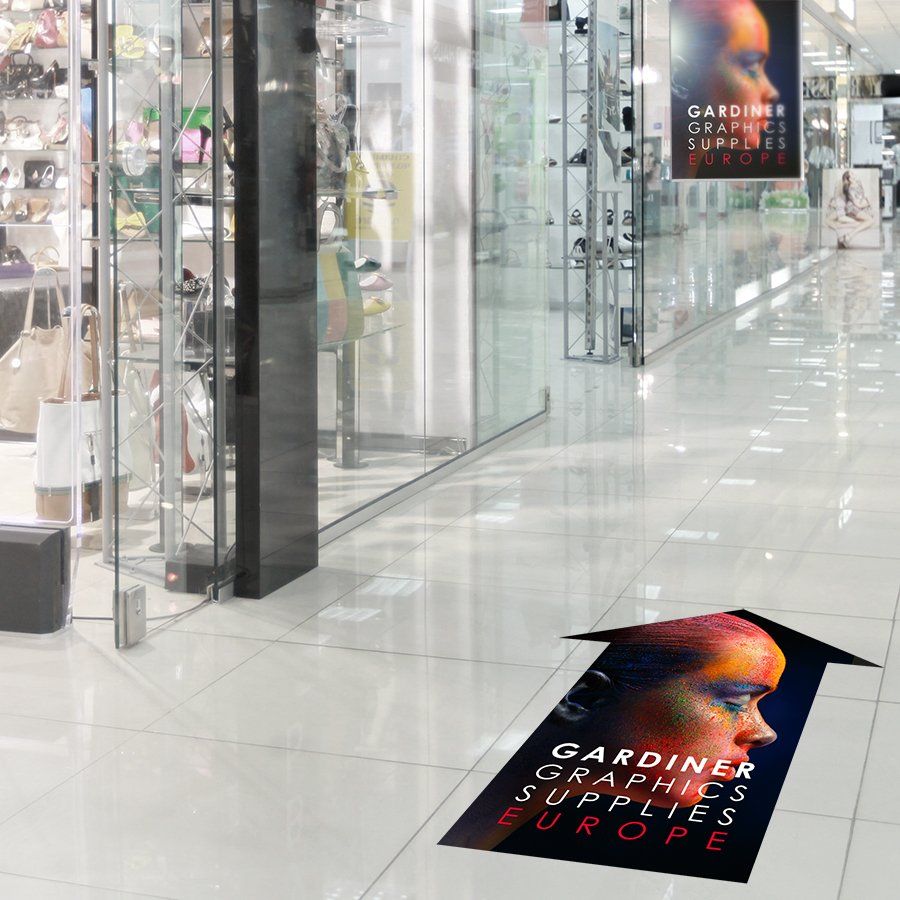
HOW TO... INSTALL INDOOR FLOOR GRAPHICS (1*)


Whatever your working surface, if you want wow-factor results – that stick! - it needs to be cleaned and prepped before application. 

Before applying indoor floor graphics, the surface needs to be clean, dry, smooth, non-porous and free from polluting agents like grease, dirt, or silicone. If required, use strong detergent to clean. 

HOW TO GUARANTEE THE BEST RESULTS:


Make sure you thoroughly rinse and dry the floor before floor graphics decal application.

Install floor graphics immediately after cleaning the area – before it gets dirty again.

Ensure the local temperature is between 15ºC (59ºF) and 25ºC (77ºF).

Secure the graphic at one end with 50mm masking tape.

Remove a section of the backing liner and begin to squeegee the decal onto the floor.

Squeegee in smooth, continuous movements from the centre towards the edges to push out air bubbles.

Make sure all edges are securely adhered to the floor.

Seal the edges of the decal with a suitable water repellent sealant. Not sure which sealant to use for your specific requirements? Ask us.

Wait at least 24 hours before cleaning the floor.

(1*) We recommend you laminate your floor graphic with a suitable Gardiner Graphics Supplies Europe product, like Crystal 100, before installation. This enhances the print, protects your graphics and provides an extra layer of safety by reducing the slip risk.

Image shows - Wall Print 300 FR digitally printable wrap

YOU WILL NEED:


A vertical plumb line

1-2 squeegee(s)

A measuring tape

YOU MIGHT ALSO NEED:


For dusty or damp walls, an adhesive-compatible sealant (non-silicone, non-waxy) or paint (non-silicone, non-waxy) is recommended.

A heat gun

Temperature-resistant silicone rollers

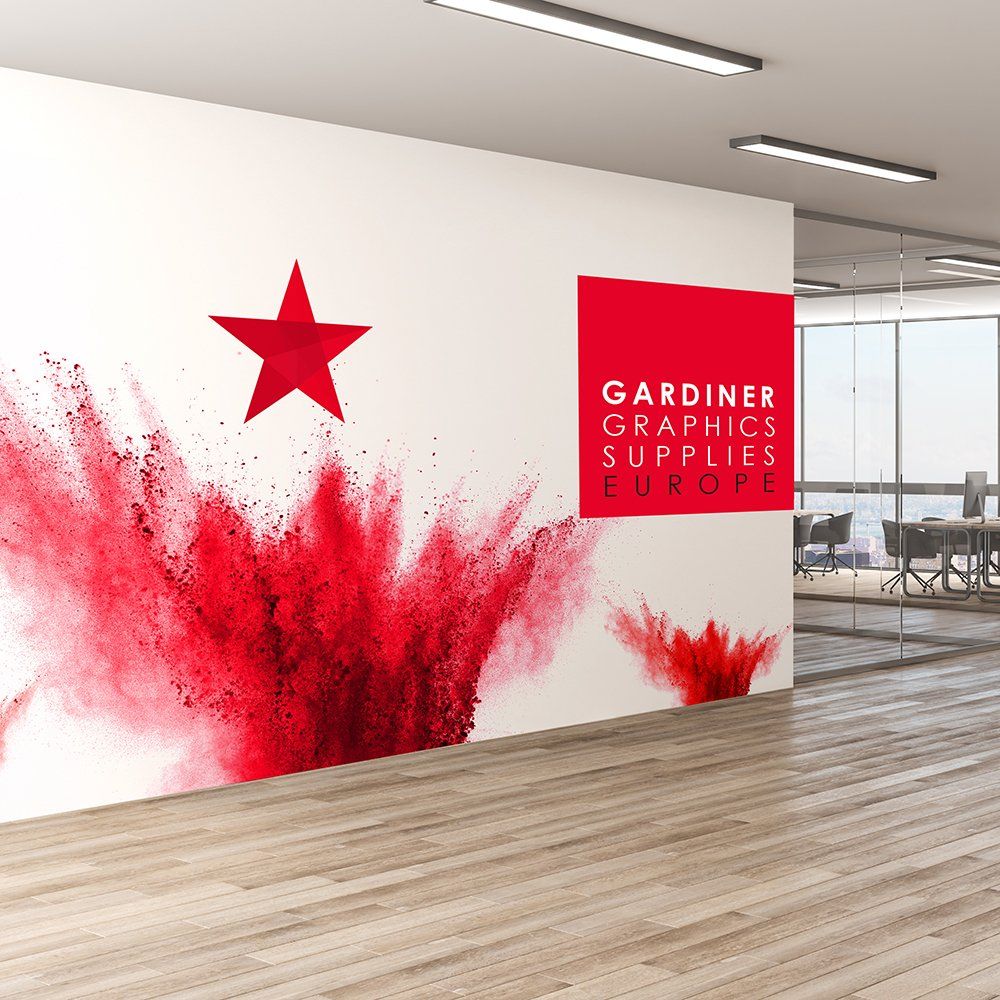
HOW TO... INSTALL WALL GRAPHICS (1*)


If you want WOW walls, you have come to the right place. In our range of wall graphics, you will find what you need to transform textured, smooth, indoor and outdoor walls.

Whatever your working surface, if you want wow-factor results – that stick! - it needs to be cleaned and prepped before application. 

IS YOUR WALL TREATED WITH SILICONE QUARTZ? IF SO, IT MIGHT NOT BE POSSIBLE TO APPLY SELF-ADHESIVE GRAPHICS. 

Talk to us for more information

HOW TO GUARANTEE THE BEST RESULTS:


If you cannot guarantee the substrate wall is dry, use a wall moisture meter to see whether you need to use an insulating primer before application.

If the wall is dusty, even after cleaning, prime it with an adhesive-compatible sealant (non-silicone, non-waxy) or paint (non-silicone, non-waxy) (2*).

Is your wall plasterboard? If it is, we recommend you apply a vinyl primer to stop ‘dusting’, a process which causes dust that affects the graphics’ adhesion.

Make sure the local temperature is between 16ºC (60.8ºF) and 25ºC (77ºF).

Mark a vertical plumb line and secure the graphics at one end.

Remove the liner and squeegee from the centre out to each edge until no bubbles remain.

If you need to make sure the graphic sticks immediately, use a heat gun.

HOW TO INSTALL WALL GRAPHICS IN MULTIPLE SECTIONS:


Make sure all surfaces to be covered are properly cleaned and prepped.

If you are covering a large surface in sections, you need to apply the graphics to the centre of the wall first and work out to the edges.

Use a tape measure to make sure the first section applied is in the right place before applying another section (3*).

Use temperature-resistant silicone rollers to help you apply the graphics quickly.

When applying multiple sections of graphics, leave an overlap of at least 1cm.

(1*) If the wall has small bumps, small cracks or old paint colours, we recommend laminating your wall graphics with a suitable Gardiner Graphics Supplies Europe product. Please note that bumps or cracks bigger than 3mm-5mm can create air pockets that prevent graphics sticking.
(2*) If you paint the wall before applying graphics, allow at least 3 to 5 days for the paint to dry at room temperature before application
(3*) PLEASE REMEMBER that walls are usually measured in centimetres (cms) – but in the world of digital graphics we work in millimetres (mms).

“We are always on the lookout for new, innovative ways to add impact to our clients’ digital print, and digital foiling seemed the best way forward. Gardiner Graphics Supplies were our obvious choice, because of our previous good experience with their range of GMP (UK) small format laminating equipment. A couple of weeks in and we’ve already completed two live jobs, with more to come!”
Steve Jones, Prom Print Digital.

We take the time to get to know our customers. We know they want to avoid huge stock costs, so when they want a product, they want it tomorrow. Our next day delivery saves them money and time. Priceless.

Can you afford not to call us?

Share by: